Lux Wireless LMS — User Guide
Version: 1.0
System URL: https://luxwireless.com
Last Updated: May 2026
1. Getting Started
1.1 System Overview
The Lux Wireless Lead Management System (LMS) is a web-based platform for capturing, tracking, and managing wireless service leads. When a customer checks whether Spectrum service is available at their address, the system records their contact information, verifies coverage via the Spectrum API and FCC data, and routes the resulting lead to the appropriate store and sales rep for follow-up.
Key capabilities: - Customer-facing address coverage checker - Automated lead capture with real-time serviceability lookup - Lead assignment by store and sales rep - QR code-based store attribution - Status tracking through the full sales cycle - Analytics, reporting, and notification delivery across multiple channels
1.2 Accessing the System
Supported browsers: Any modern browser (Chrome, Firefox, Safari, Edge). JavaScript must be enabled.
Device compatibility: Works on desktop and mobile. The customer-facing coverage checker is optimized for mobile.
There are two separate login portals:
| Portal | URL | Who Uses It |
|---|---|---|
| Rep / Admin Login | https://luxwireless.com/rep/login |
Sales reps, store managers, admins |
| Store Login | https://luxwireless.com/store/login |
Store users (store-level accounts) |
Visiting the root URL (https://luxwireless.com)
redirects automatically to the rep login page.
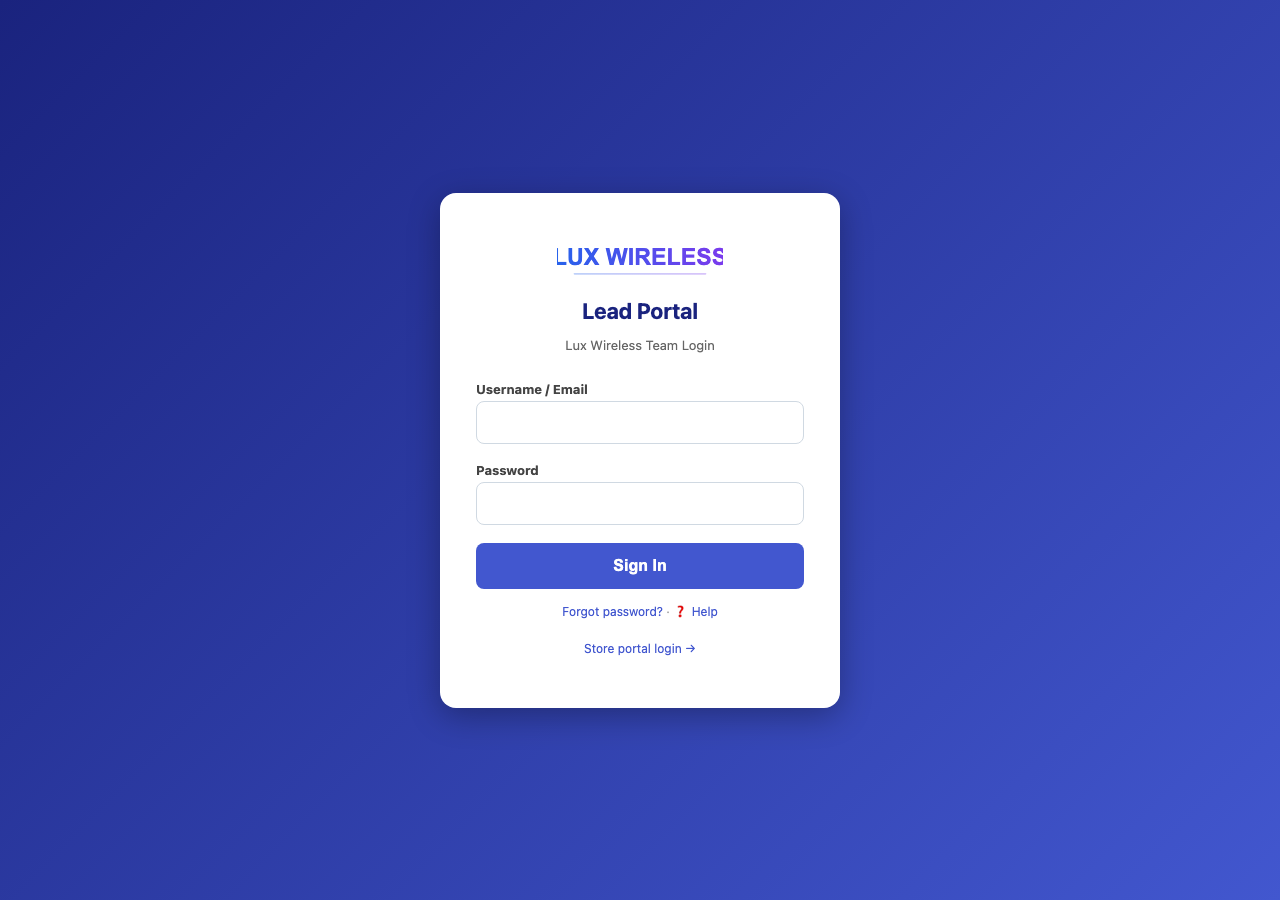
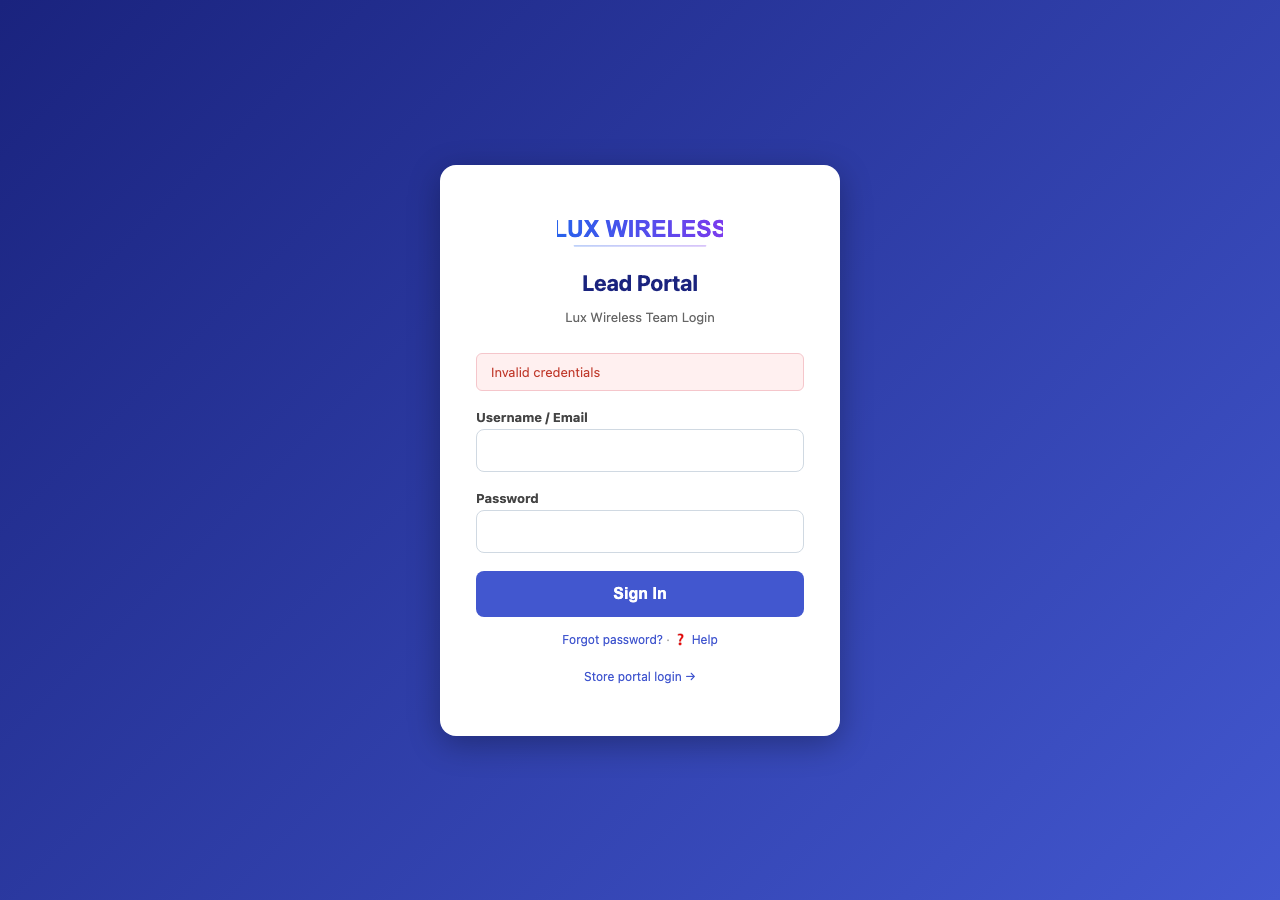
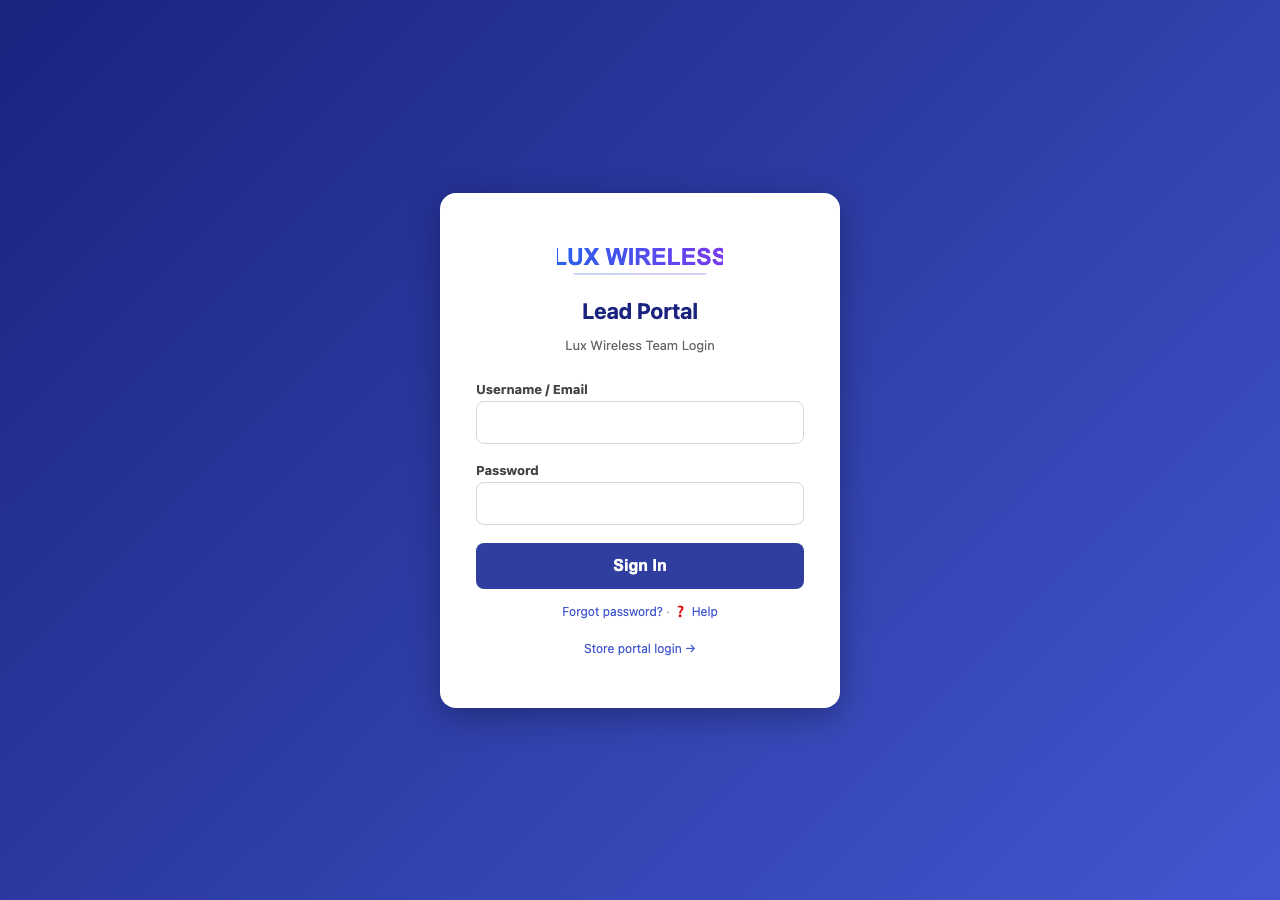
1.3 Logging In
For Sales Reps, Store Managers, and Admins:
- Go to
https://luxwireless.com/rep/login - Enter your username and password
- Click Log In
For Store Users:
- Go to
https://luxwireless.com/store/login - Enter your store username and password
- Click Log In
If you’ve forgotten your password: - Store users: click Forgot Password on the store login page - Reps and admins: contact your administrator to reset your password
1.4 Roles & Permissions Overview
| Role | What They Can Do |
|---|---|
| Admin / Super Admin | Full access — manage stores, reps, analytics, notifications, impersonate users, run reports, view telemetry, configure serviceability |
| Sales Rep | View all leads, set location, update lead status/notes, export leads, view alerts |
| Store Manager | Regional dashboard, view leads for assigned stores |
| Store User | View own store’s leads, manage QR codes, export leads, update store password |
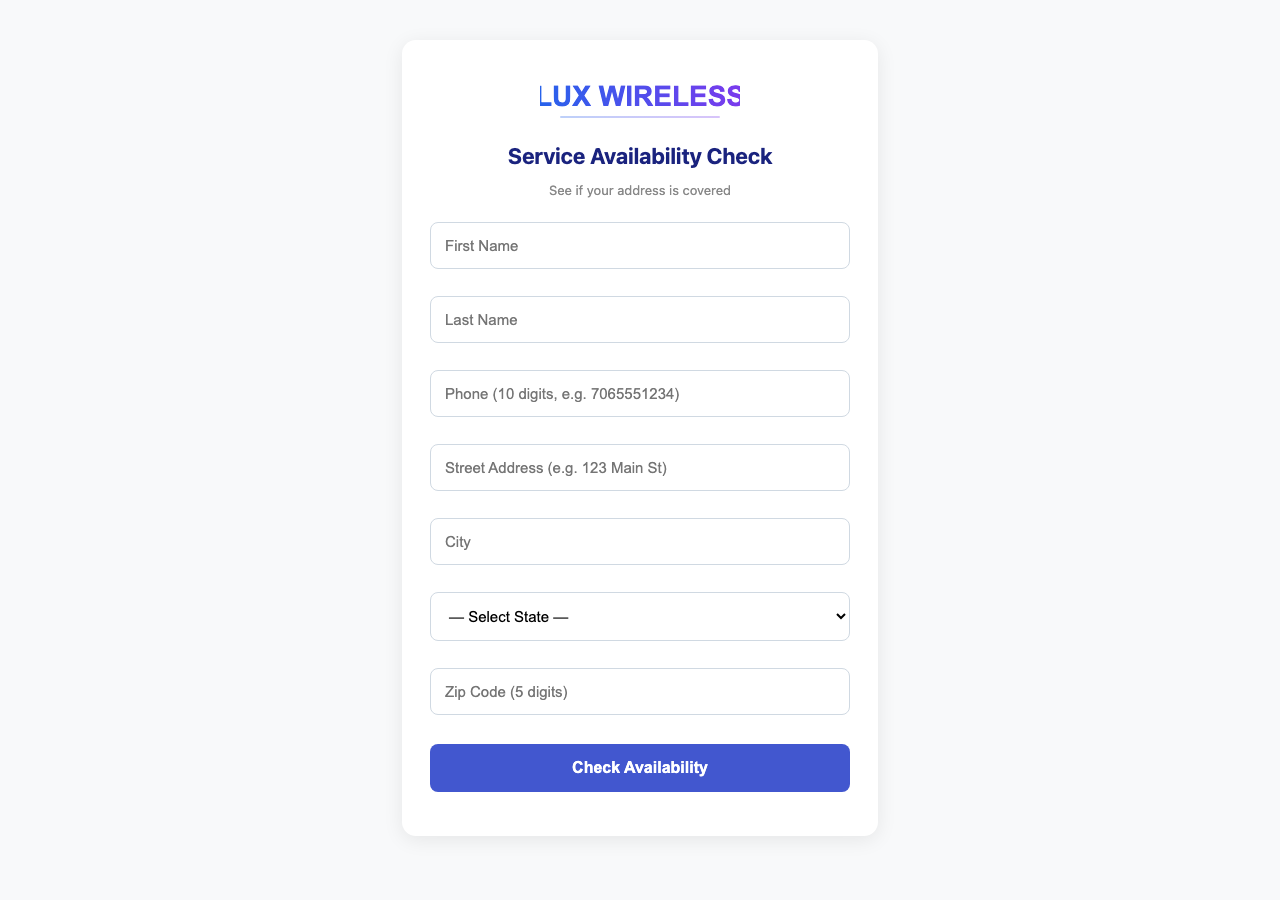
2. Address Coverage Checker (Customer-Facing)
2.1 How It Works
The coverage checker at https://luxwireless.com/check is
a public-facing form that customers use to find out whether Spectrum
service is available at their address.
Steps from the customer’s perspective:
- Customer navigates to the check page (directly or via a QR code scan)
- Customer enters their name, phone number, and service address
- The system checks coverage using:
- Spectrum’s coverage API (via Camoufox browser automation)
- FCC broadband data as a fallback
- Customer is shown a result immediately
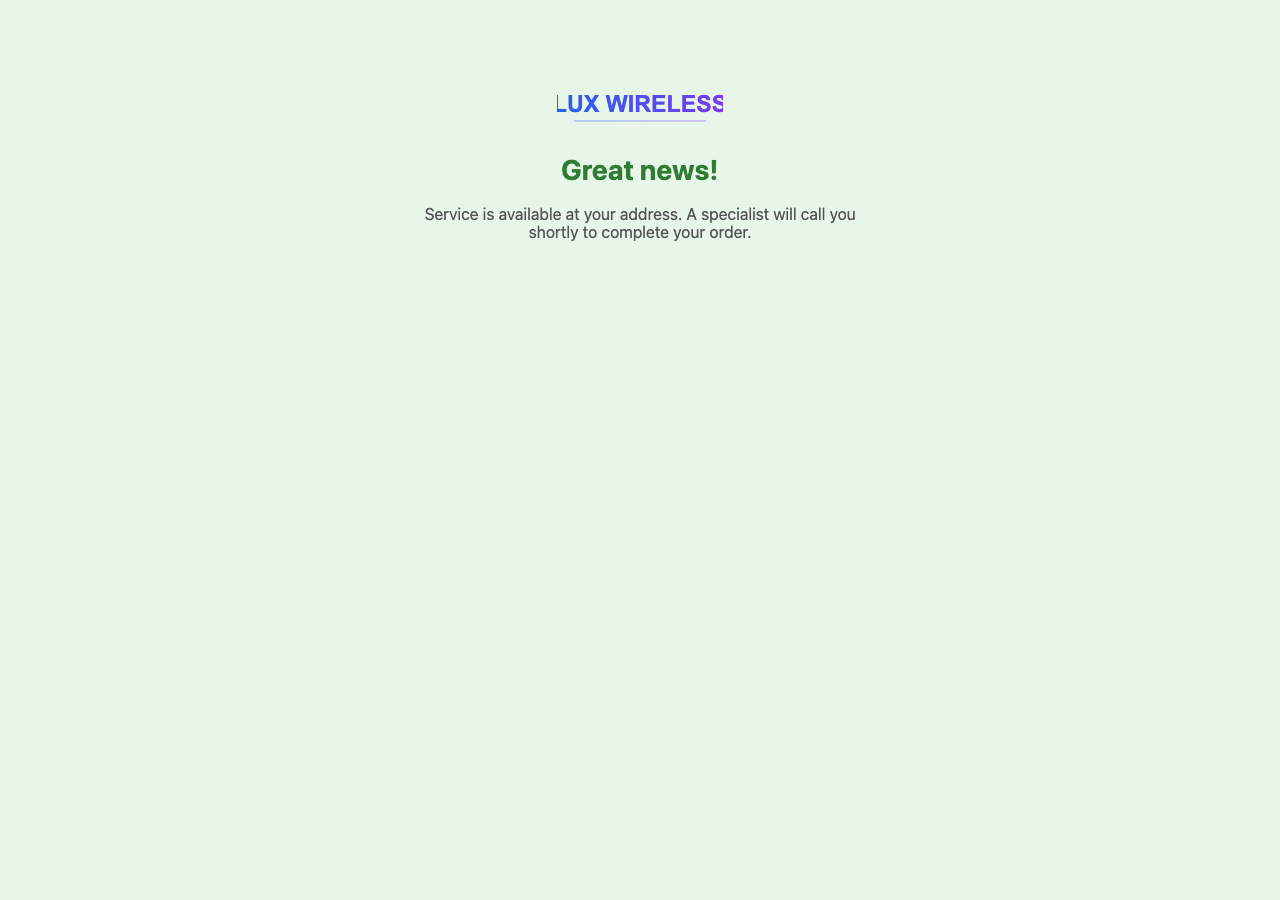
2.2 Coverage Outcomes
Covered — Service Available: - Customer is shown a
success confirmation page (/success) - Their information is
saved as a lead in the system - The lead is marked as
covered - Assigned reps and stores are notified (per
notification settings)
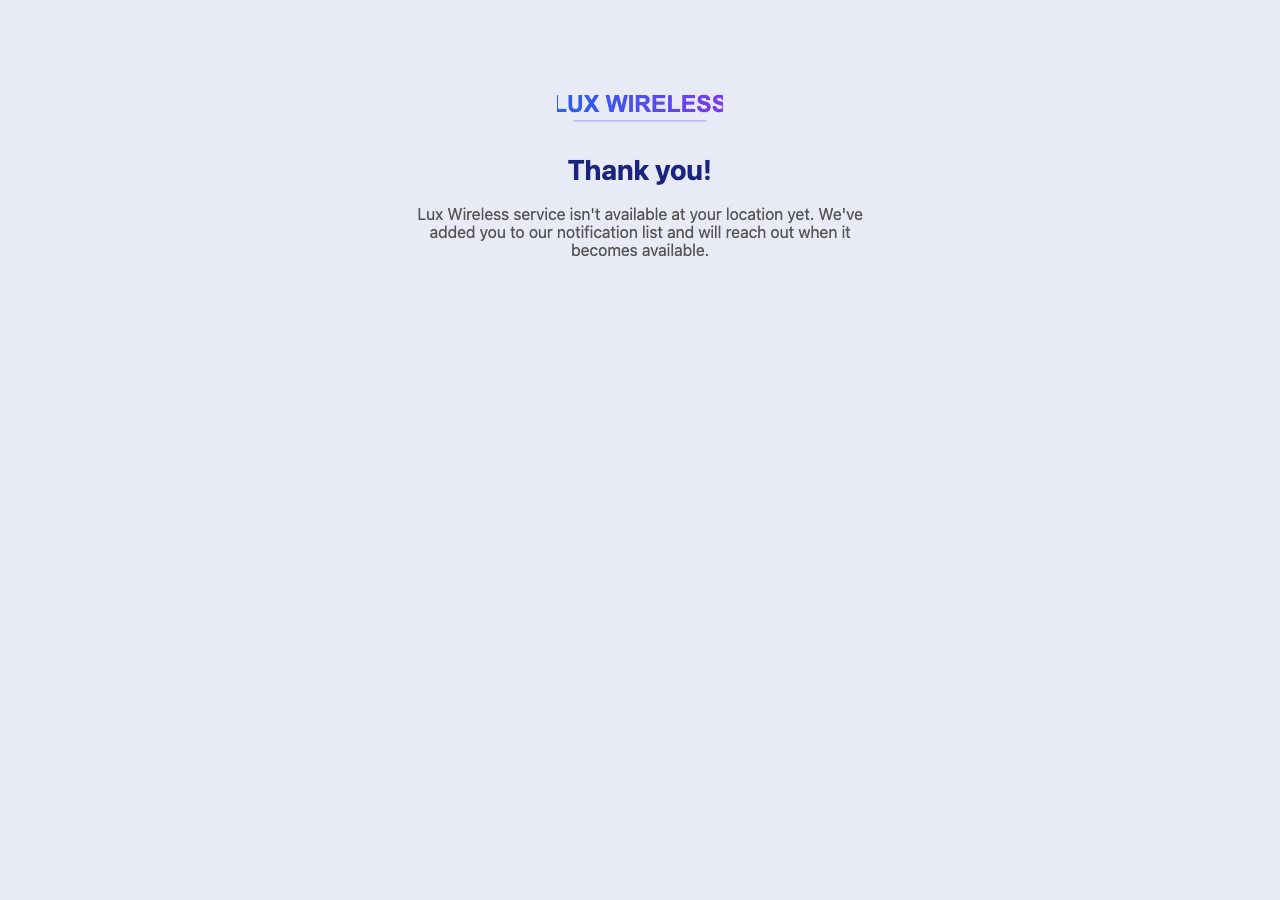
Not Covered — Waitlist: - Customer is shown the
waitlist page (/waitlist) - Their information is still
captured as a lead in the system - The lead is marked as not
covered - Store/rep notifications may or may not fire depending
on the “covered only” filter setting
2.3 QR Code Scan Flow
When a customer scans a store QR code before checking their address:
- The QR code URL (
/qr/<token>) loads in the customer’s browser - The system reads the QR token, identifies the originating store, and saves that store attribution in the browser session
- The customer is redirected to the coverage check form
- When the lead is submitted, it is automatically associated with the store that printed that QR code
This ensures the right store gets credit for the lead, even if no rep is physically present.
3. Sales Representative Guide
3.1 Logging In
- Go to
https://luxwireless.com/rep/login - Enter your rep username and password
- Click Log In
- You will be taken to the Sales Dashboard
To log out, click your name or the logout link and select Log
Out (/rep/logout).
3.2 Sales Dashboard Overview
The Sales Dashboard (/rep/sales/dashboard) is your home
base. It gives you a full picture of leads and your current
location.
What you’ll see:
- Stats cards — Total leads, leads today, covered leads, conversion rate
- Location selector — Set which store you’re currently working from
- Lead list — All leads in the system, newest first, with status indicators
- Quick filters — Filter by status, covered/uncovered, date range
3.3 Setting Your Store Location
Before you start working leads, set your current store location so that new leads you generate are attributed to the right store.
- On the Sales Dashboard, find the Set Location dropdown or button
- Select your current store from the list
- Click Set Location (this submits to
/rep/sales/set-location) - Confirmation appears — your location is now set
Your location persists for the session. If you move to a different store, update it again.
3.4 QR Code Check-In
You can also check in to a store by scanning its QR code:
- Scan the store QR code with your phone (URL:
/rep/sales/qr/<token>) - The system recognizes your rep account and sets your current location to that store automatically
- You’re redirected to your dashboard with location confirmed
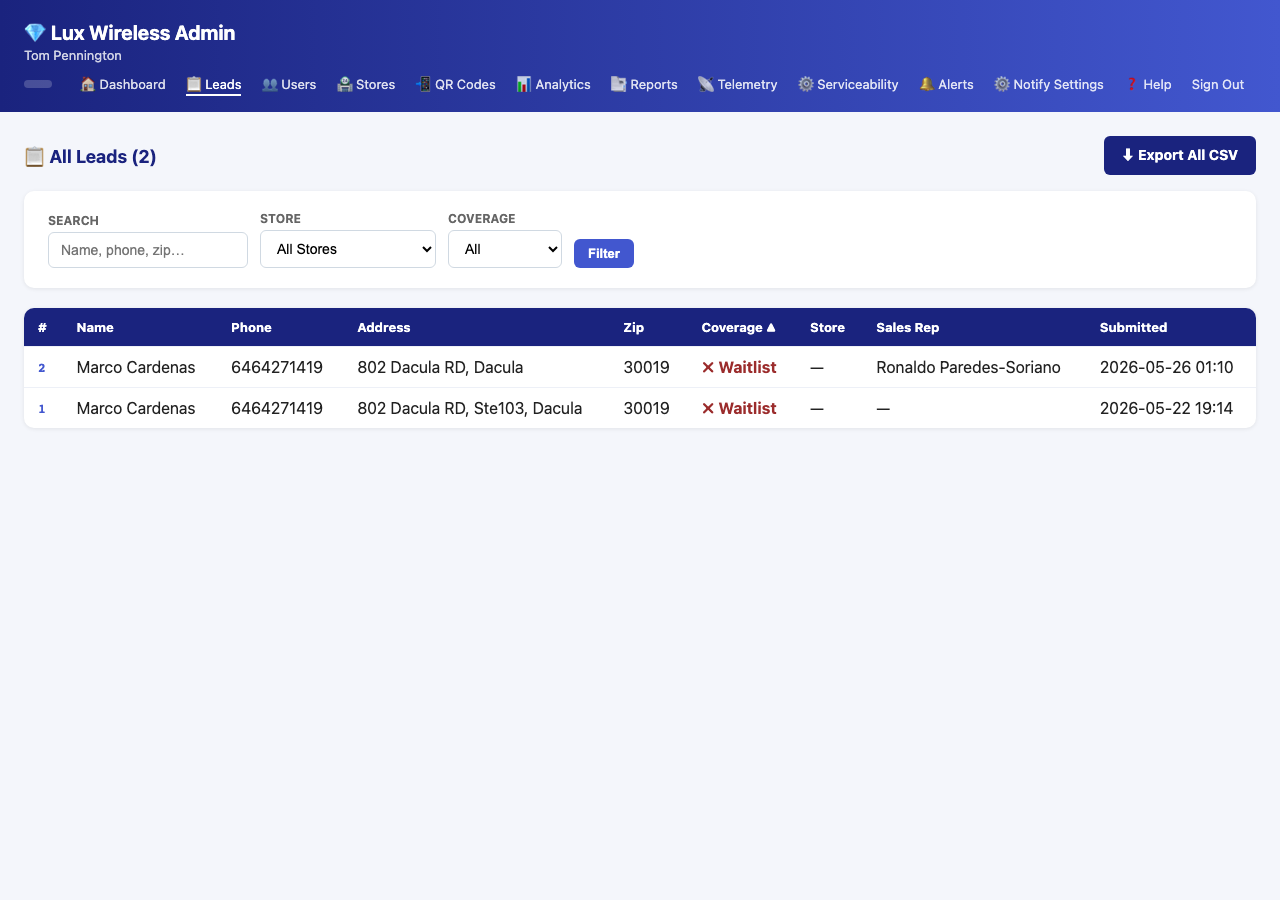
3.5 Viewing Leads
On the Sales Dashboard, all leads are listed in a table. Each row shows:
| Column | Description |
|---|---|
| Name | Customer’s first and last name |
| Phone | Customer’s phone number |
| Address | Street, city, state, zip |
| Covered | ✅ Yes / ❌ No — whether Spectrum is available |
| Status | Current lead status (New, In Progress, Sold, Customer Declined) |
| Store | Store the lead is attributed to |
| Rep | Rep who generated the lead (if any) |
| Date | When the lead was submitted |
Click any lead row to open the Lead Detail Page.
3.6 Lead Detail Page
The Lead Detail Page (/rep/lead/<id>) shows
everything about a specific lead.
Sections on this page:
Customer Information - Full name, phone number, full address
Serviceability Data - Whether the address is covered by Spectrum - Spectrum coverage code returned by the API - FCC lookup results (provider availability, technology types, speeds)
Lead Attribution - Store the lead came from - Rep assigned (if any) - QR token (if the lead came from a QR scan) - Date/time submitted
Status & Follow-Up - Current status - Reference number (for tracking in Spectrum’s system) - Notes field - Action buttons to update status
3.7 Updating Lead Status
Lead status tracks where a customer is in the sales process. There are four statuses:
| Status | Meaning |
|---|---|
| New | Just submitted — not yet contacted |
| In Progress | You’ve made contact or are actively working this lead |
| Sold | Customer signed up — deal closed |
| Customer Declined | Customer said no or is not interested |
To update a lead’s status:
- Open the Lead Detail Page (
/rep/lead/<id>) - In the Status section, select the new status from the dropdown
- Optionally add a reference number and/or notes (see Section 3.8)
- Click Update (submits to
/rep/lead/<id>/update) - The page refreshes with the updated status
Best practice: Move a lead to In Progress as soon as you contact the customer. Update to Sold or Customer Declined once the outcome is known. Keep New only for leads you haven’t touched yet.
3.8 Adding Reference Numbers and Notes
Reference Number: This is the Spectrum confirmation or account number you receive when a customer signs up. Enter it in the Reference Number field on the Lead Detail Page. This is how you tie the LMS record to the actual Spectrum account.
Notes: Use the notes field to record anything useful — call summaries, best times to reach the customer, follow-up reminders, or special circumstances. Notes are visible to all reps and admins who can view the lead.
- Open the Lead Detail Page
- Click into the Notes field and type your notes
- Enter the reference number if applicable
- Click Update
3.9 Exporting Leads to CSV
To download your leads as a spreadsheet:
- On the Sales Dashboard, click the Export button
- The system generates a CSV file for your leads
(
/rep/sales/export) - The file downloads automatically to your device
The CSV includes: name, phone, address, coverage status, lead status, reference number, notes, store, date.
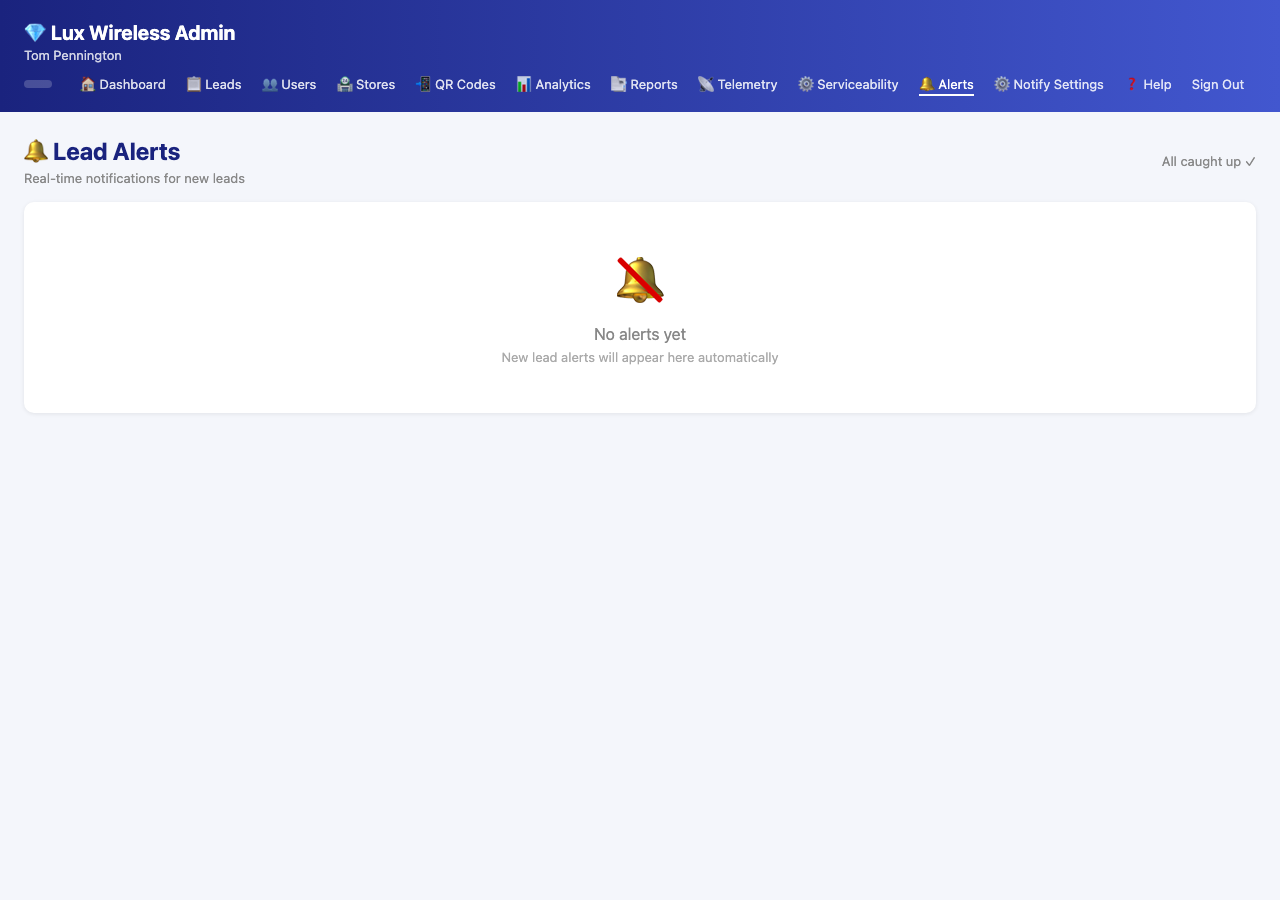
3.10 Alert Feed
The Alert Feed (/rep/alerts) shows real-time
notifications about new leads.
Accessing the alert feed: - Look for the bell icon or Alerts link in the navigation bar - A badge count shows how many unread alerts you have
In the alert feed, you can: - See new lead
notifications with customer name and address - Click an alert to go
directly to the Lead Detail Page - Mark individual alerts as read
(/rep/alerts/mark-read/<id>) - Mark all alerts as
read at once (/rep/alerts/mark-all-read)
The unread badge in the nav updates in real time via a background API
call (/rep/api/notification-config).
4. Store Manager Guide
4.1 Logging In
Store managers use the same rep login portal:
- Go to
https://luxwireless.com/rep/login - Enter your store manager username and password
- Click Log In
- You will be taken to the Store Manager Dashboard
4.2 Regional Dashboard
The Store Manager Dashboard
(/rep/store-manager/dashboard) gives you a regional view of
all stores assigned to you.
What you’ll see:
- Assigned stores list — Each store you manage, with its current lead count and status breakdown
- Aggregate stats — Total leads across all your stores, covered vs. uncovered
- Lead feed — Recent leads across all assigned stores, sorted by date
4.3 Managing Assigned Stores’ Leads
As a store manager, you can view leads from all stores assigned to you by your administrator.
To view leads for a specific store: 1. On the Store Manager Dashboard, click the store name 2. The lead list filters to show only that store’s leads 3. Click any lead to view the full Lead Detail Page
You can view lead details, statuses, and notes — but lead status updates are performed by sales reps. If you need a status updated, contact the assigned rep or an administrator.
4.4 Exporting Data
Store managers can export leads from within their regional view:
- Navigate to the store whose leads you want to export
- Click the Export button
- A CSV file downloads for that store’s leads
This is useful for building your own reports or sharing data with store owners.
5. Store User Guide
Store users are store-level accounts (not rep accounts). Each physical store location can have its own login that lets store staff view their store’s leads, manage QR codes, and export data.
5.1 Store Login
- Go to
https://luxwireless.com/store/login - Enter your store username and password
- Click Log In
- You will be taken to the Store Dashboard
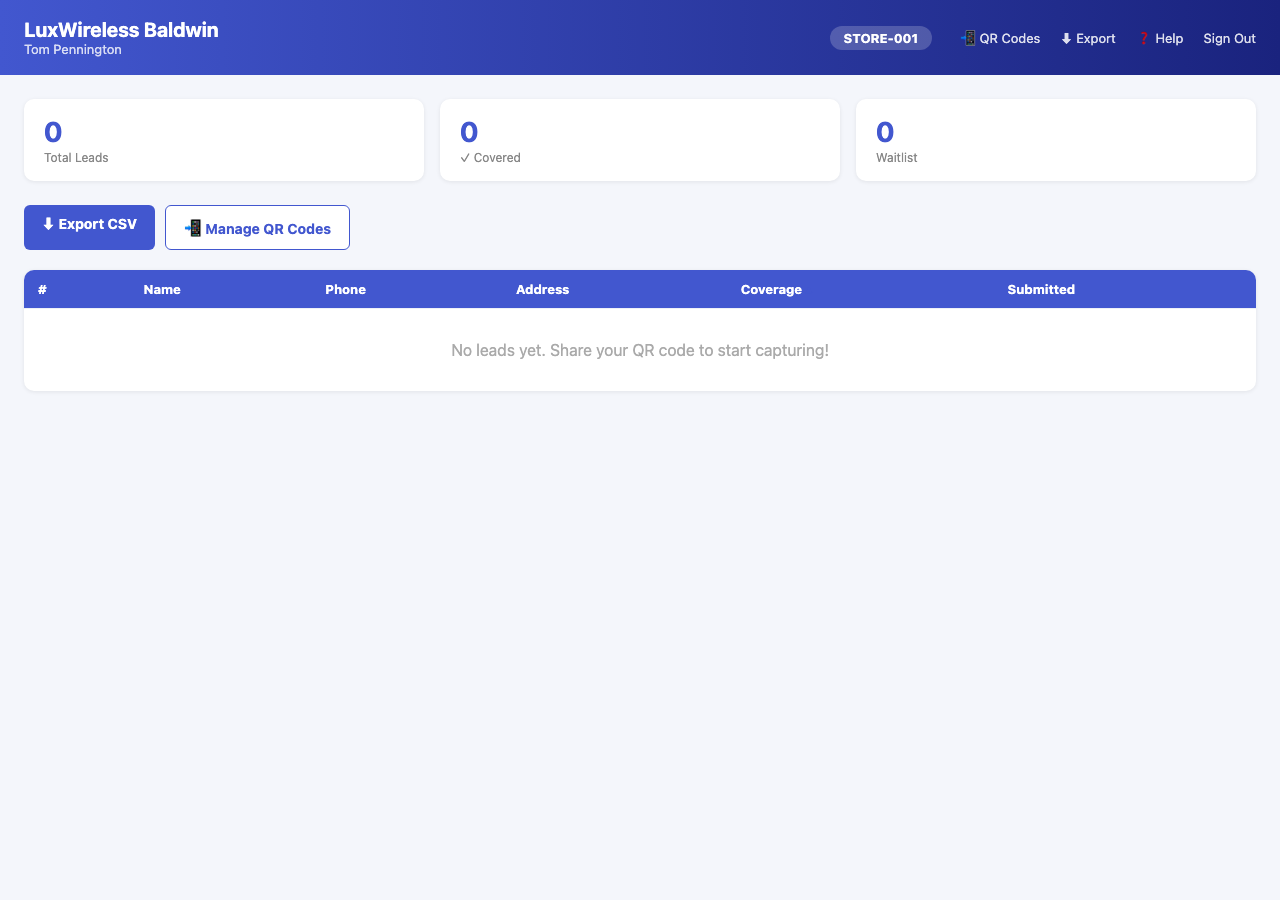
5.2 Store Dashboard
The Store Dashboard (/store/dashboard) shows all leads
attributed to your store.
What you’ll see:
- Summary stats — Total leads, leads today, covered leads, conversion rate
- Lead table — All leads for your store, with name, phone, address, coverage status, and lead status
- Quick filters — Filter by date, status, or coverage
Click any lead row to see full details (read-only view).
5.3 QR Code Management
QR codes let you drive customer traffic to the coverage checker while attributing those leads to your store.
Viewing your QR codes: 1. On the Store Dashboard,
click QR Codes or navigate to /store/qr 2.
All active QR codes for your store are listed with their label and scan
count
Creating a new QR code: 1. On the QR Codes page,
click New QR Code (navigates to
/store/qr/new) 2. Enter a label for the QR
code (e.g., “Front Window Display”, “Counter Sign”) 3. Click
Create 4. The new QR code appears in your list
Using QR codes: - Print or display the QR code wherever customers will scan it - Each scan is tracked — the scan count increments on your QR code list - Each scan correctly attributes the resulting lead to your store
5.4 Viewing and Exporting Leads
Viewing a lead: 1. Click any row in the Store Dashboard lead table 2. You can see customer info, coverage results, and current status 3. Store users cannot update lead status — that is done by reps and admins
Exporting leads to CSV: 1. On the Store Dashboard,
click Export (navigates to /store/export)
2. A CSV file containing all your store’s leads downloads
automatically
5.5 Password Reset
If you’ve forgotten your store password:
- Go to
https://luxwireless.com/store/login - Click Forgot Password
- Follow the instructions to reset your password
If you cannot reset via the self-service flow, contact your administrator.
6. Administrator Guide
Admins have full access to every feature in the system. This section covers all admin-exclusive functionality.
6.1 Admin Dashboard Overview
The Admin Dashboard (/rep/admin/dashboard) is the
command center for the entire system.
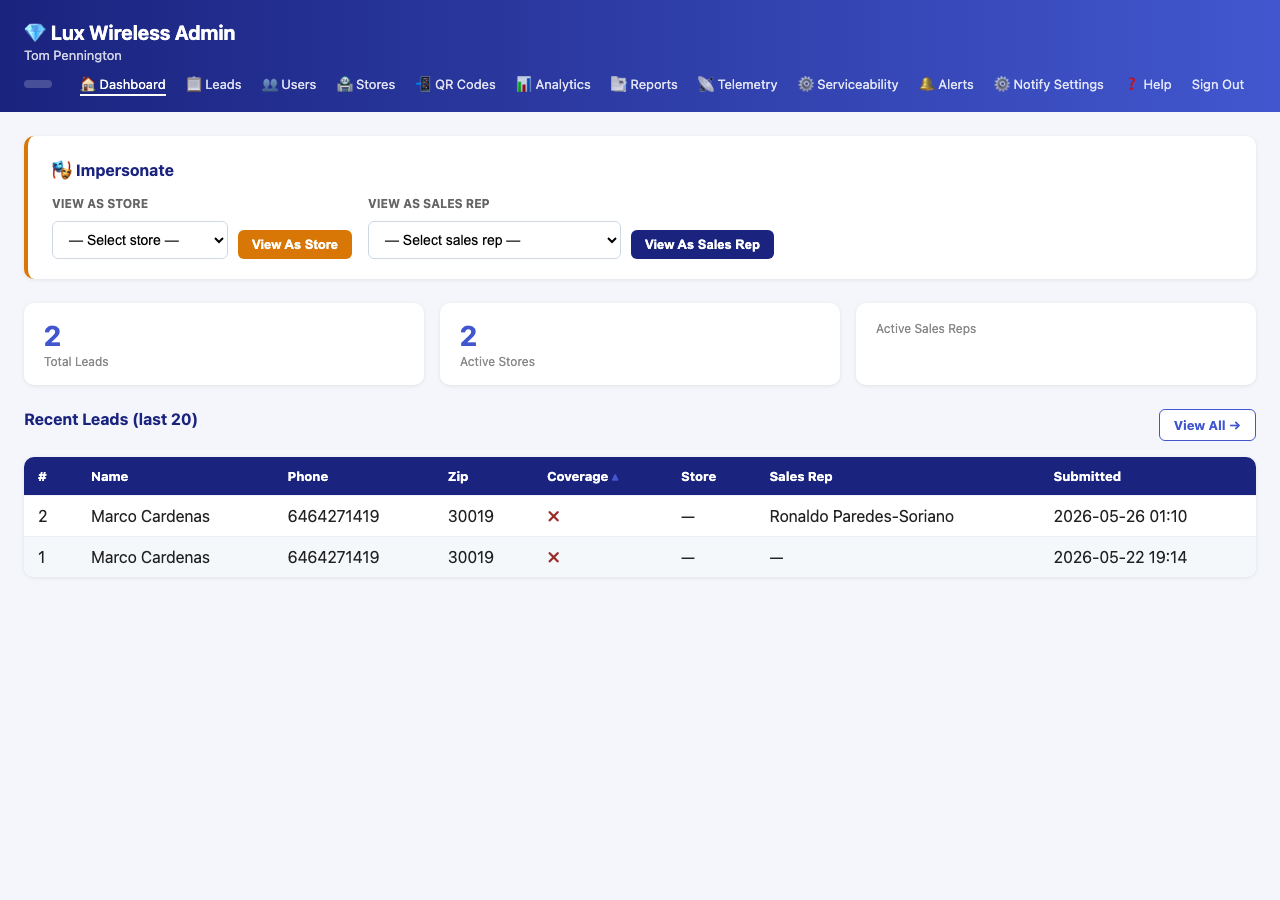
What you’ll see:
- Impersonation bar — A persistent control at the top of the page to view the system as any store or rep
- Lead table — All leads in the system, every store, every rep
- Navigation — Links to all admin sections (Representatives, Stores, QR Codes, Analytics, Reports, Notifications, Telemetry, Serviceability Config)
- System stats — Total leads, stores, reps, today’s activity
6.2 Managing Representatives
Navigate to /rep/admin/representatives to manage all
sales reps and admins.
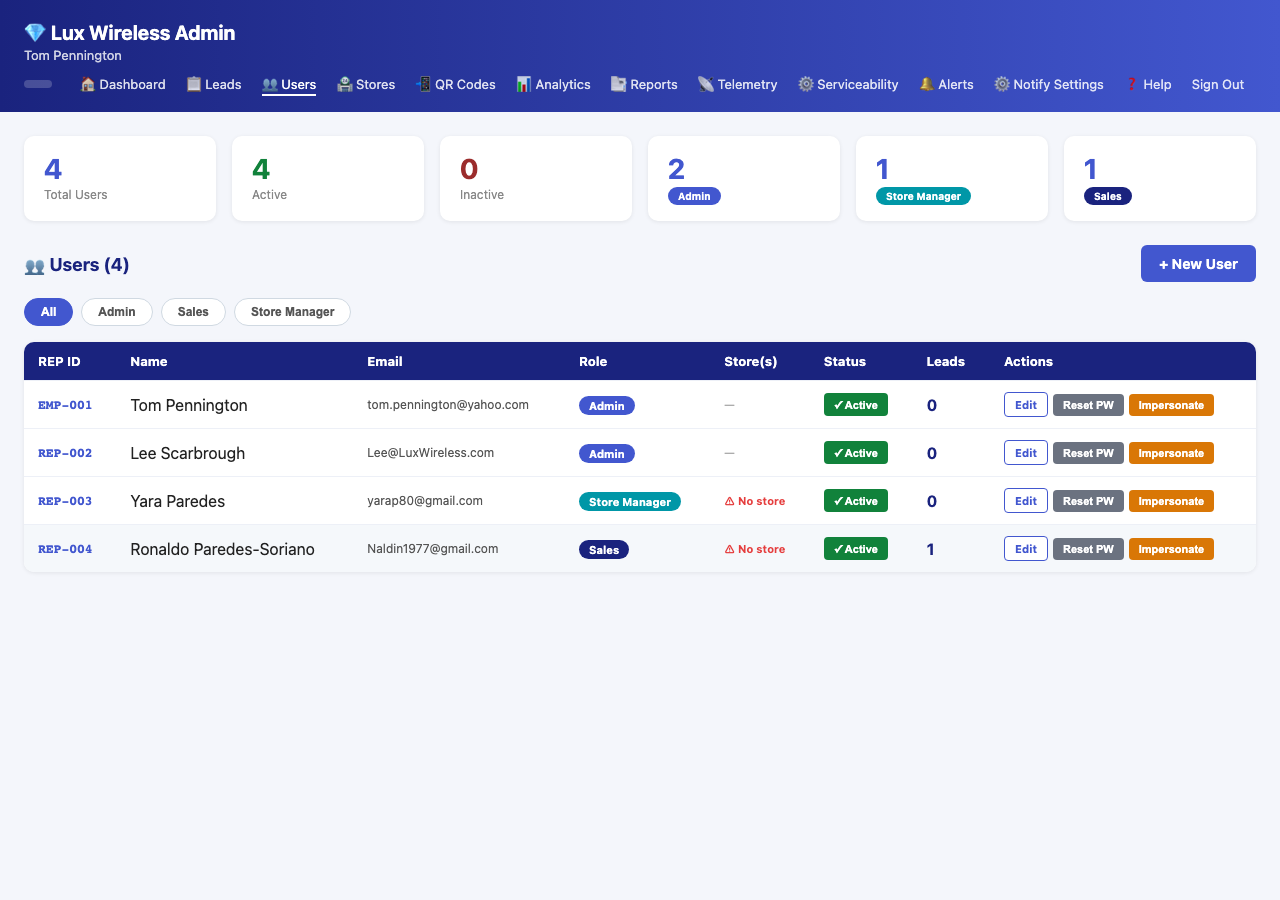
Viewing all reps: - The rep list shows every representative with their role, current store assignment, and active status - Click a rep’s name to view their stats (leads generated, conversion rate)
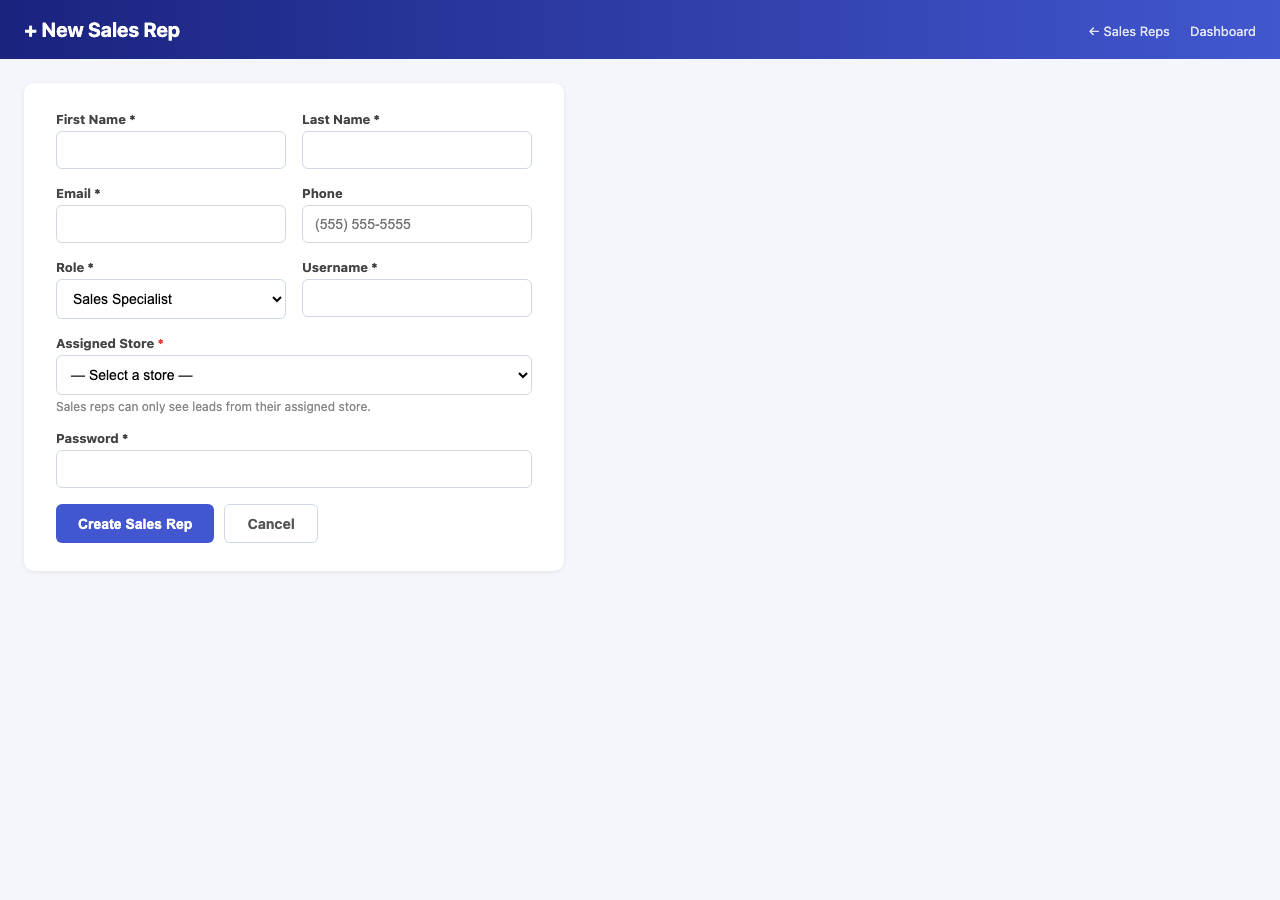
Adding a new rep: 1. Click New
Representative (navigates to
/rep/admin/representatives/new) 2. Fill in: - First name,
last name - Email address - Phone number - Role: sales,
store_manager, or admin - Username - Password
3. Click Save
Editing a rep: 1. On the rep list, click
Edit next to the rep’s name
(/rep/admin/representatives/<id>/edit) 2. Update any
fields 3. Click Save
Resetting a rep’s password: 1. On the rep list,
click Reset Password next to the rep’s name 2. Confirm
the reset (submits to
/rep/admin/representatives/<id>/reset-password) 3. A
new temporary password is set — provide it to the rep
Activating or deactivating a rep: 1. On the rep
list, click Activate or Deactivate
next to the rep’s name 2. This toggles the rep’s active
status (submits to
/rep/admin/representatives/<id>/toggle-active) 3.
Deactivated reps cannot log in
Note: Always deactivate rather than delete reps who leave the company. Their lead history is preserved.
6.3 Managing Stores
Navigate to /admin/stores to manage all store
locations.
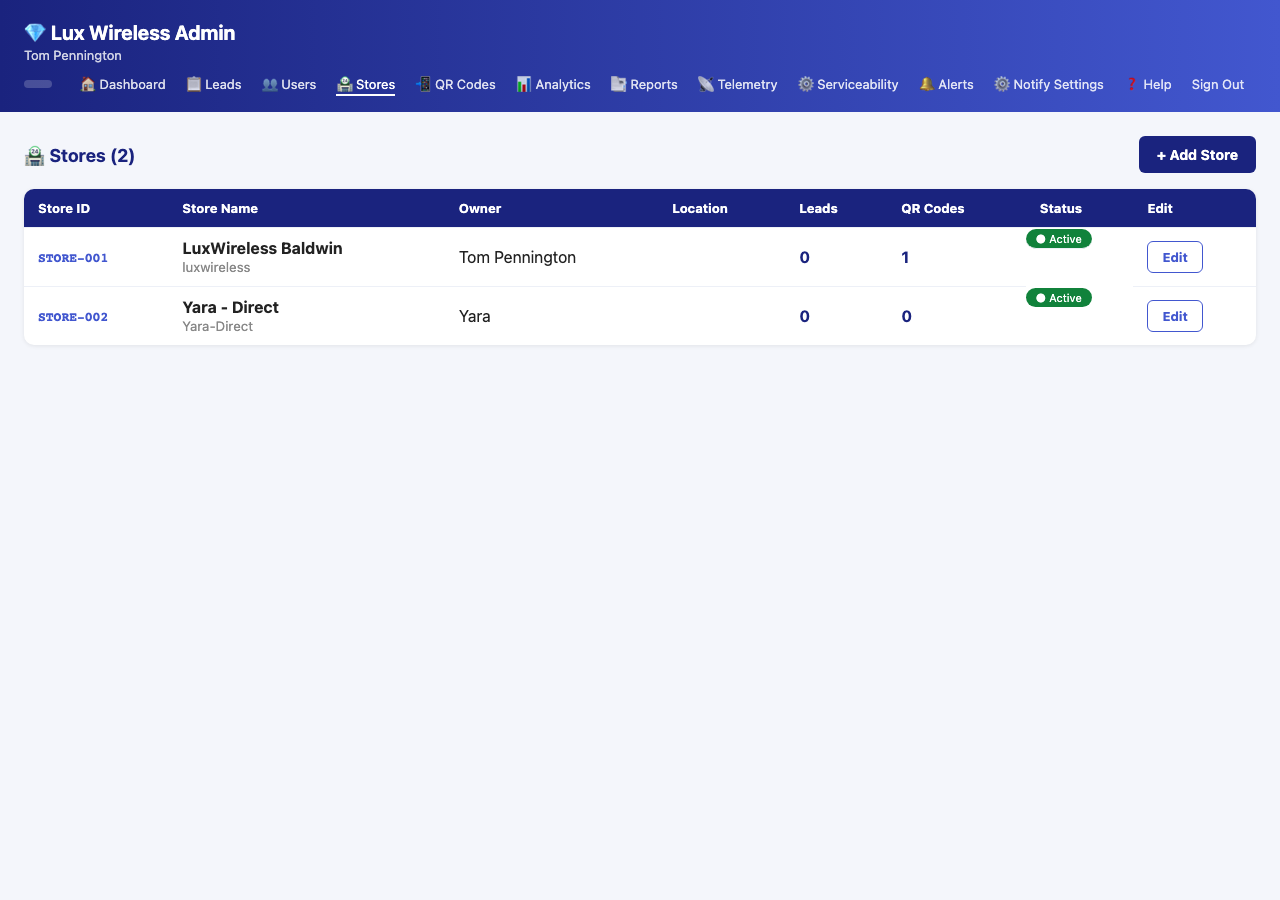
Adding a new store: 1. Click New
Store (navigates to /admin/stores/new) 2. Fill in:
- Store name (e.g., “LuxWireless Baldwin”) - Owner name - Email - Phone
- Address, city, state, zip - Username (for store login) - Password 3.
Click Save
Editing a store: 1. Click Edit next
to the store name (/admin/stores/<id>/edit) 2. Update
any fields as needed 3. Click Save
Stores cannot be deleted via the UI — contact support if a store record needs to be removed.
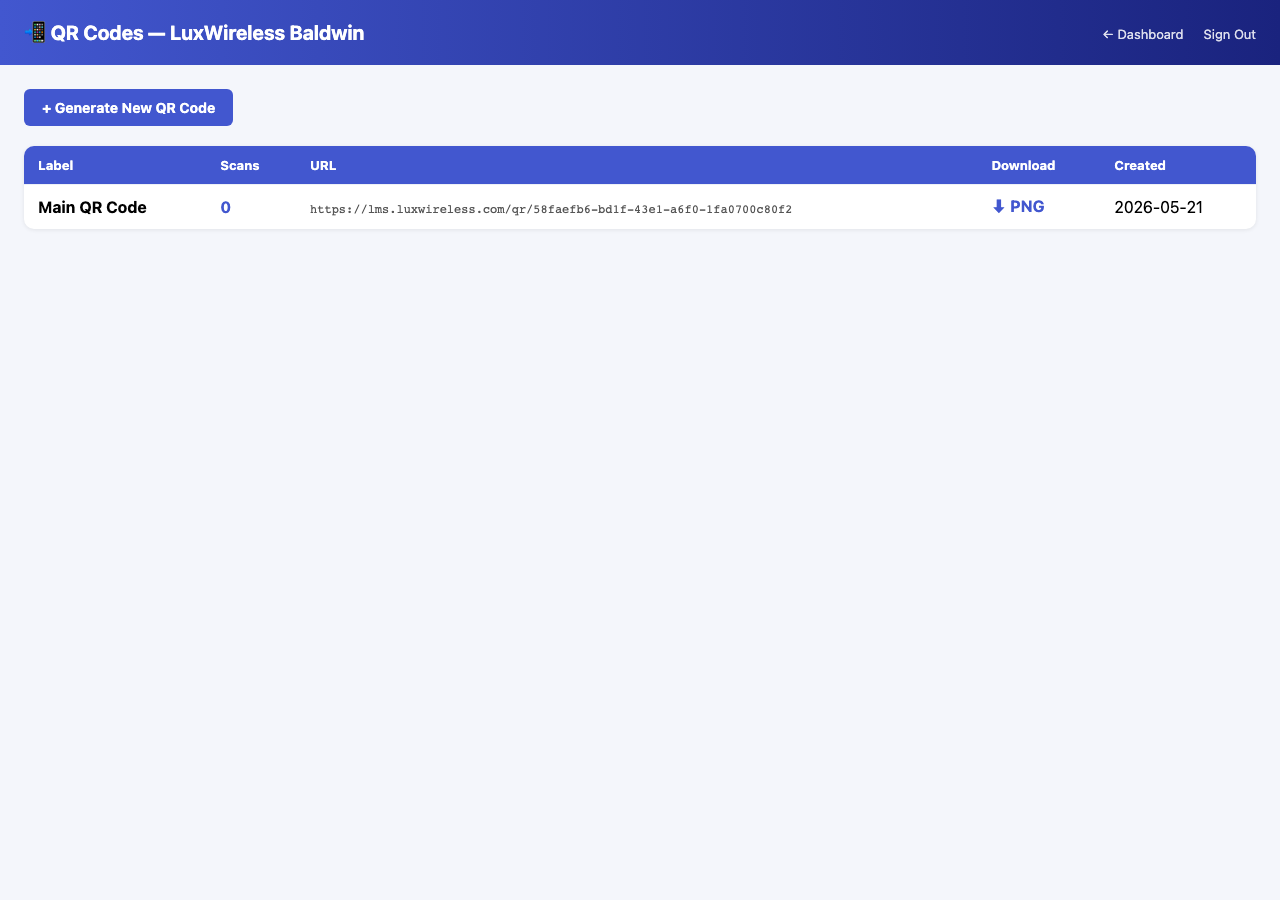
6.4 QR Code Management
Admin QR code management provides a system-wide view of all QR codes across all stores.
Navigate to /admin/qr.
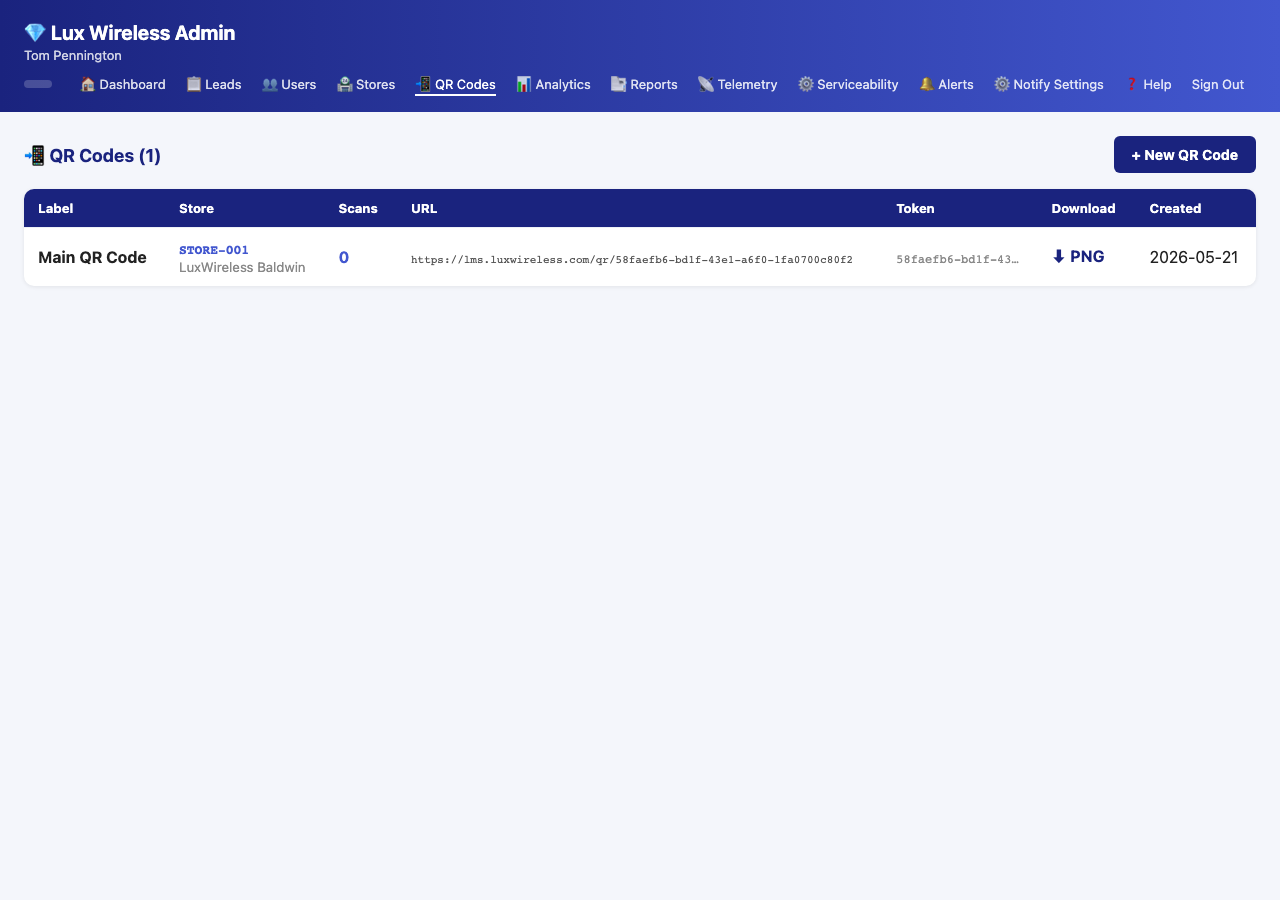
Creating a QR code: 1. Click New QR
Code (/admin/qr/new) 2. Select the store to
associate it with 3. Enter a label (e.g., “Window Display — Baldwin”) 4.
Click Create
Downloading a QR code: 1. On the QR code list, click
Download next to any code
(/admin/qr/<id>/download) 2. The QR code image
downloads as a PNG file 3. Print it and place it at the store
location
Monitoring scan activity: - The scan count column updates every time a customer scans a code - Use scan counts to measure the effectiveness of each display location
6.5 Lead Management & Filtering
Admins can view and filter all leads in the system at
/admin/leads.
Available filters: - Store — Show leads from a specific store - Status — Filter by New, In Progress, Sold, or Customer Declined - Coverage — Filter by covered or not covered - Date range — Show leads submitted within a specific date range - Rep — Show leads attributed to a specific rep
Apply any combination of filters to narrow the lead list. The filtered results can be used as the basis for exports and reports.
6.6 Impersonation
Impersonation lets admins view the system exactly as a store user or sales rep would see it — useful for troubleshooting, training, or verifying that a user is seeing the right data.
To impersonate a user: 1. On the Admin Dashboard,
find the Impersonation bar (or navigate to
/rep/admin/impersonate) 2. Select the store or rep you want
to impersonate from the dropdown 3. Click Impersonate
4. The system now shows you exactly what that user sees 5. An
impersonation banner stays visible at the top of every page
To stop impersonating: 1. Click the Stop
Impersonating button in the banner (navigates to
/rep/admin/stop-impersonate) 2. You return to your normal
admin view
⚠️ Important: While impersonating, any actions you take are performed in the context of the impersonated user. Be careful about making changes while in impersonation mode.
6.7 Analytics Dashboard
Navigate to /admin/analytics for a visual overview of
system performance.
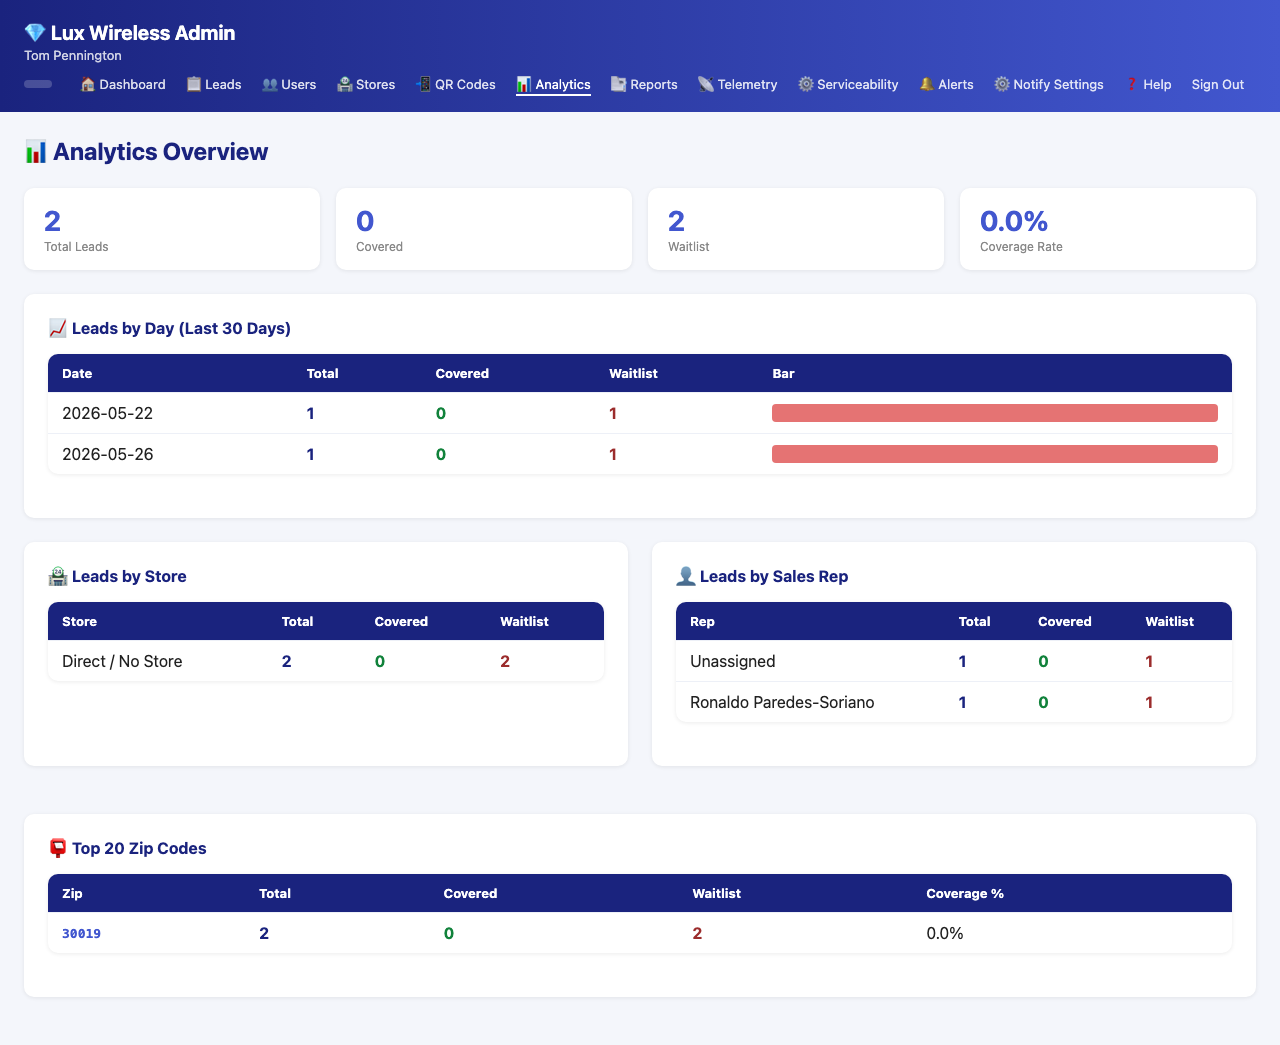
Available charts:
Leads by Day (30-Day Trend) - Line chart showing lead volume over the past 30 days - Helps identify daily/weekly patterns, slow periods, and campaign spikes
Leads by Store - Bar chart showing how many leads each store has generated - Compare store performance at a glance
Leads by Rep - Bar chart showing lead counts per sales rep - Identify top performers and reps who may need support
Coverage Rate - Donut/pie chart showing the percentage of leads where Spectrum service is available vs. not available - High uncovered rate may indicate the wrong geographic targeting
Top Zip Codes - Table listing the zip codes with the most leads - Helps identify the most active service areas and potential expansion targets
6.8 Reports & BI Builder
The Reports module (/reports/) provides a custom report
builder for deeper data analysis.
Report List: - All saved reports are listed with name, last run date, and a favorite star - Click any report name to open it - Templates are listed separately for starting new reports
6.8.1 Report Templates
Navigate to /reports/templates to see available starting
templates.
Templates provide pre-built report configurations for common needs (e.g., “Weekly Store Summary”, “Rep Performance”, “Coverage Analysis”). Select a template to create a new report based on it.
6.8.2 Creating and Running a Report
To run an existing report: 1. On the report list,
click the report name (/reports/<id>) 2. Review the
report configuration 3. Click Run or
Execute (submits to
/reports/<id>/execute) 4. Results appear on the
page
To view execution history: - Navigate to
/reports/logs to see a log of all past report runs,
including who ran them and when
See also: Section 10 — Reports & Analytics for full reporting details.
6.9 Notification Configuration
Navigate to /rep/admin/notifications to configure how
and when each rep and store receives lead notifications.
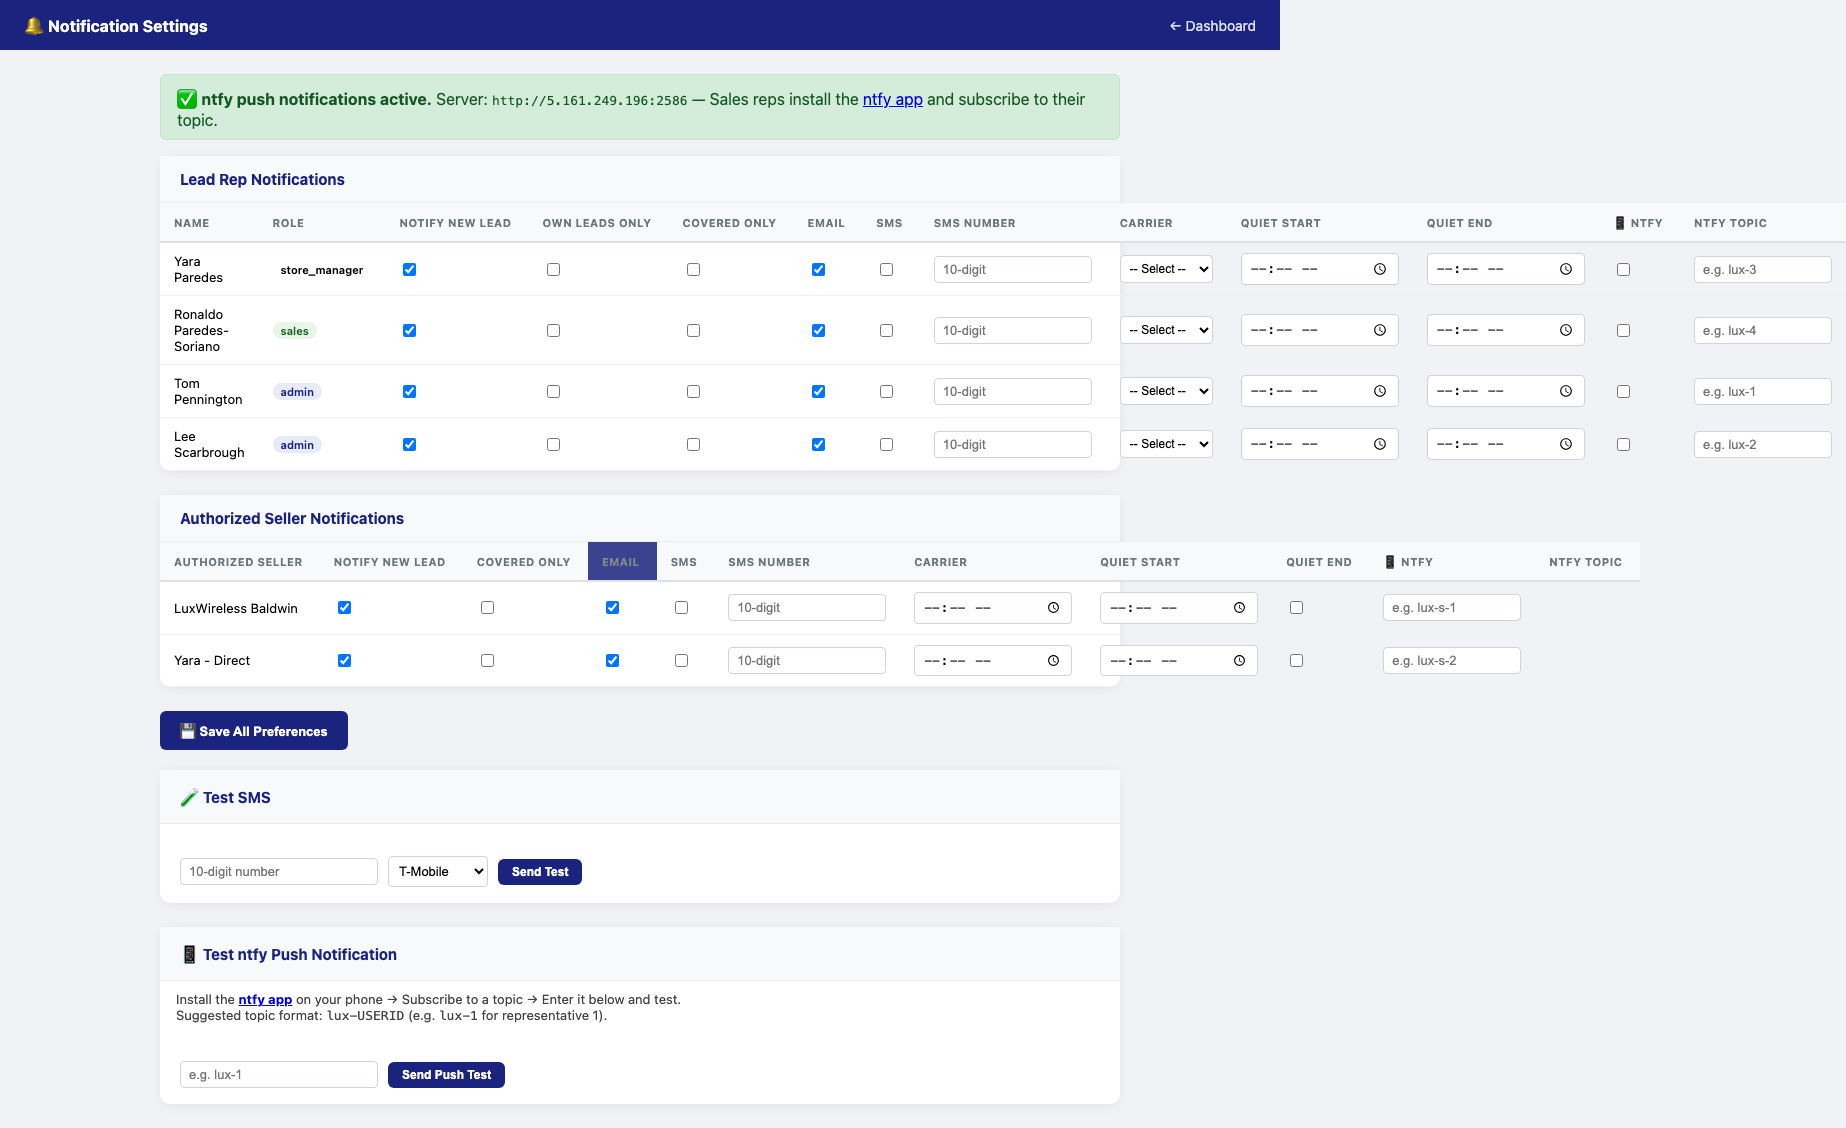
Per-user settings you can configure:
| Setting | Description |
|---|---|
| New Lead Alerts | Toggle whether this user receives alerts for new leads |
| Own Leads Only | If on, user only gets alerts for leads assigned to them |
| Covered Only | If on, user only gets alerts for leads where coverage is confirmed |
| Send notifications to the user’s email address | |
| SMS | Send notifications via SMS (uses email-to-SMS gateway) |
| ntfy | Send push notifications via ntfy (mobile/browser push) |
| Quiet Hours | Define a time window during which notifications are suppressed |
To update a user’s notification settings: 1. Select the user from the list 2. Adjust their settings using the toggles and fields 3. Settings save automatically or click Save
See also: Section 9 — Notification System for the full notification reference.
6.10 Telemetry
Navigate to /rep/admin/telemetry for system health
monitoring.
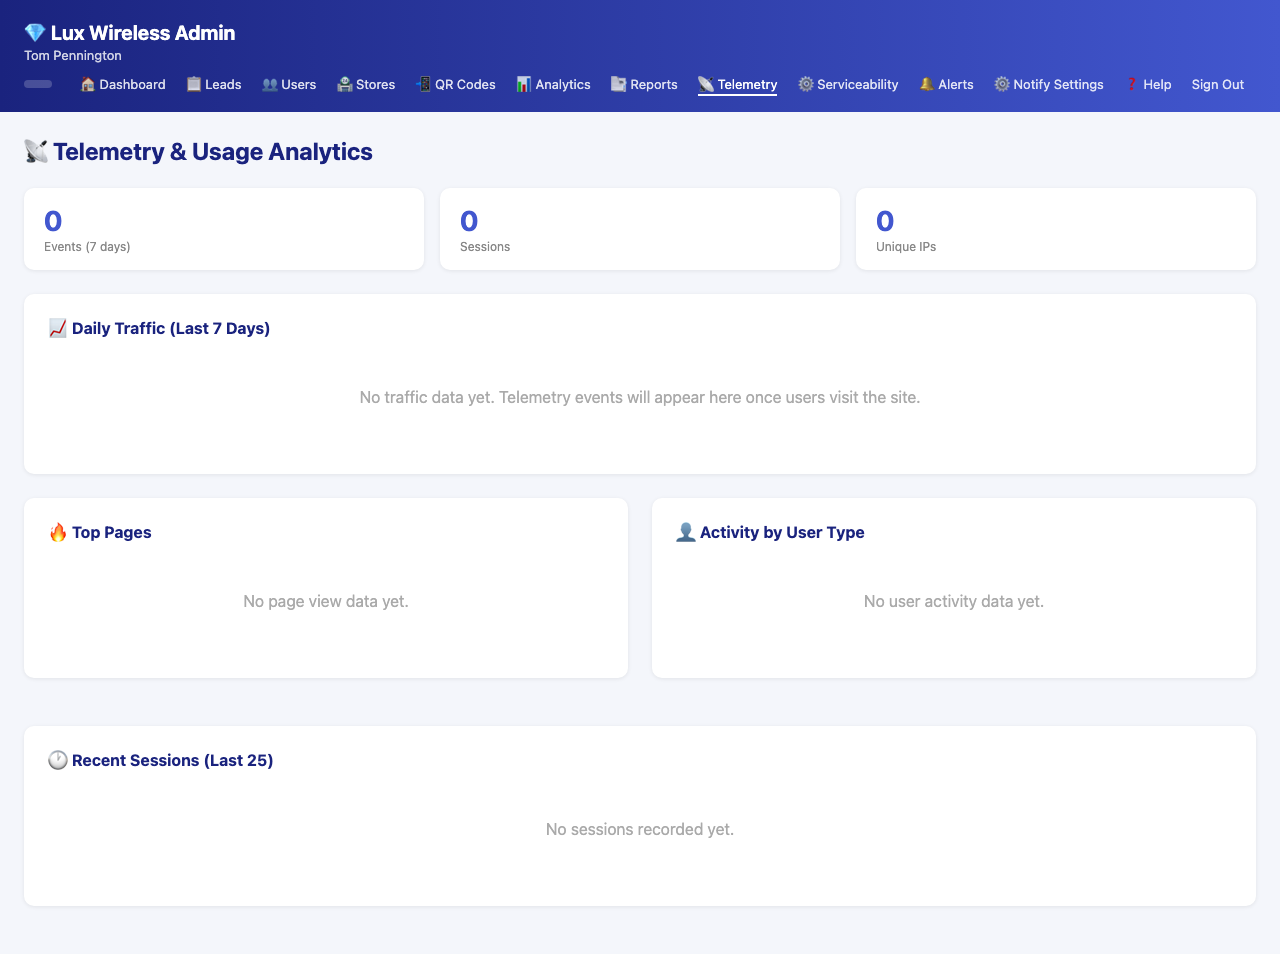
The Telemetry dashboard shows: - Server response times and API latency - Lead submission success/failure rates - Coverage API call volume and response codes - Database query performance - Recent error logs
Use telemetry to diagnose slow performance, API failures, or unexpected behavior in the coverage checker.
6.11 Serviceability Configuration
Navigate to /rep/admin/serviceability-config to adjust
how the Spectrum/FCC coverage checker works.
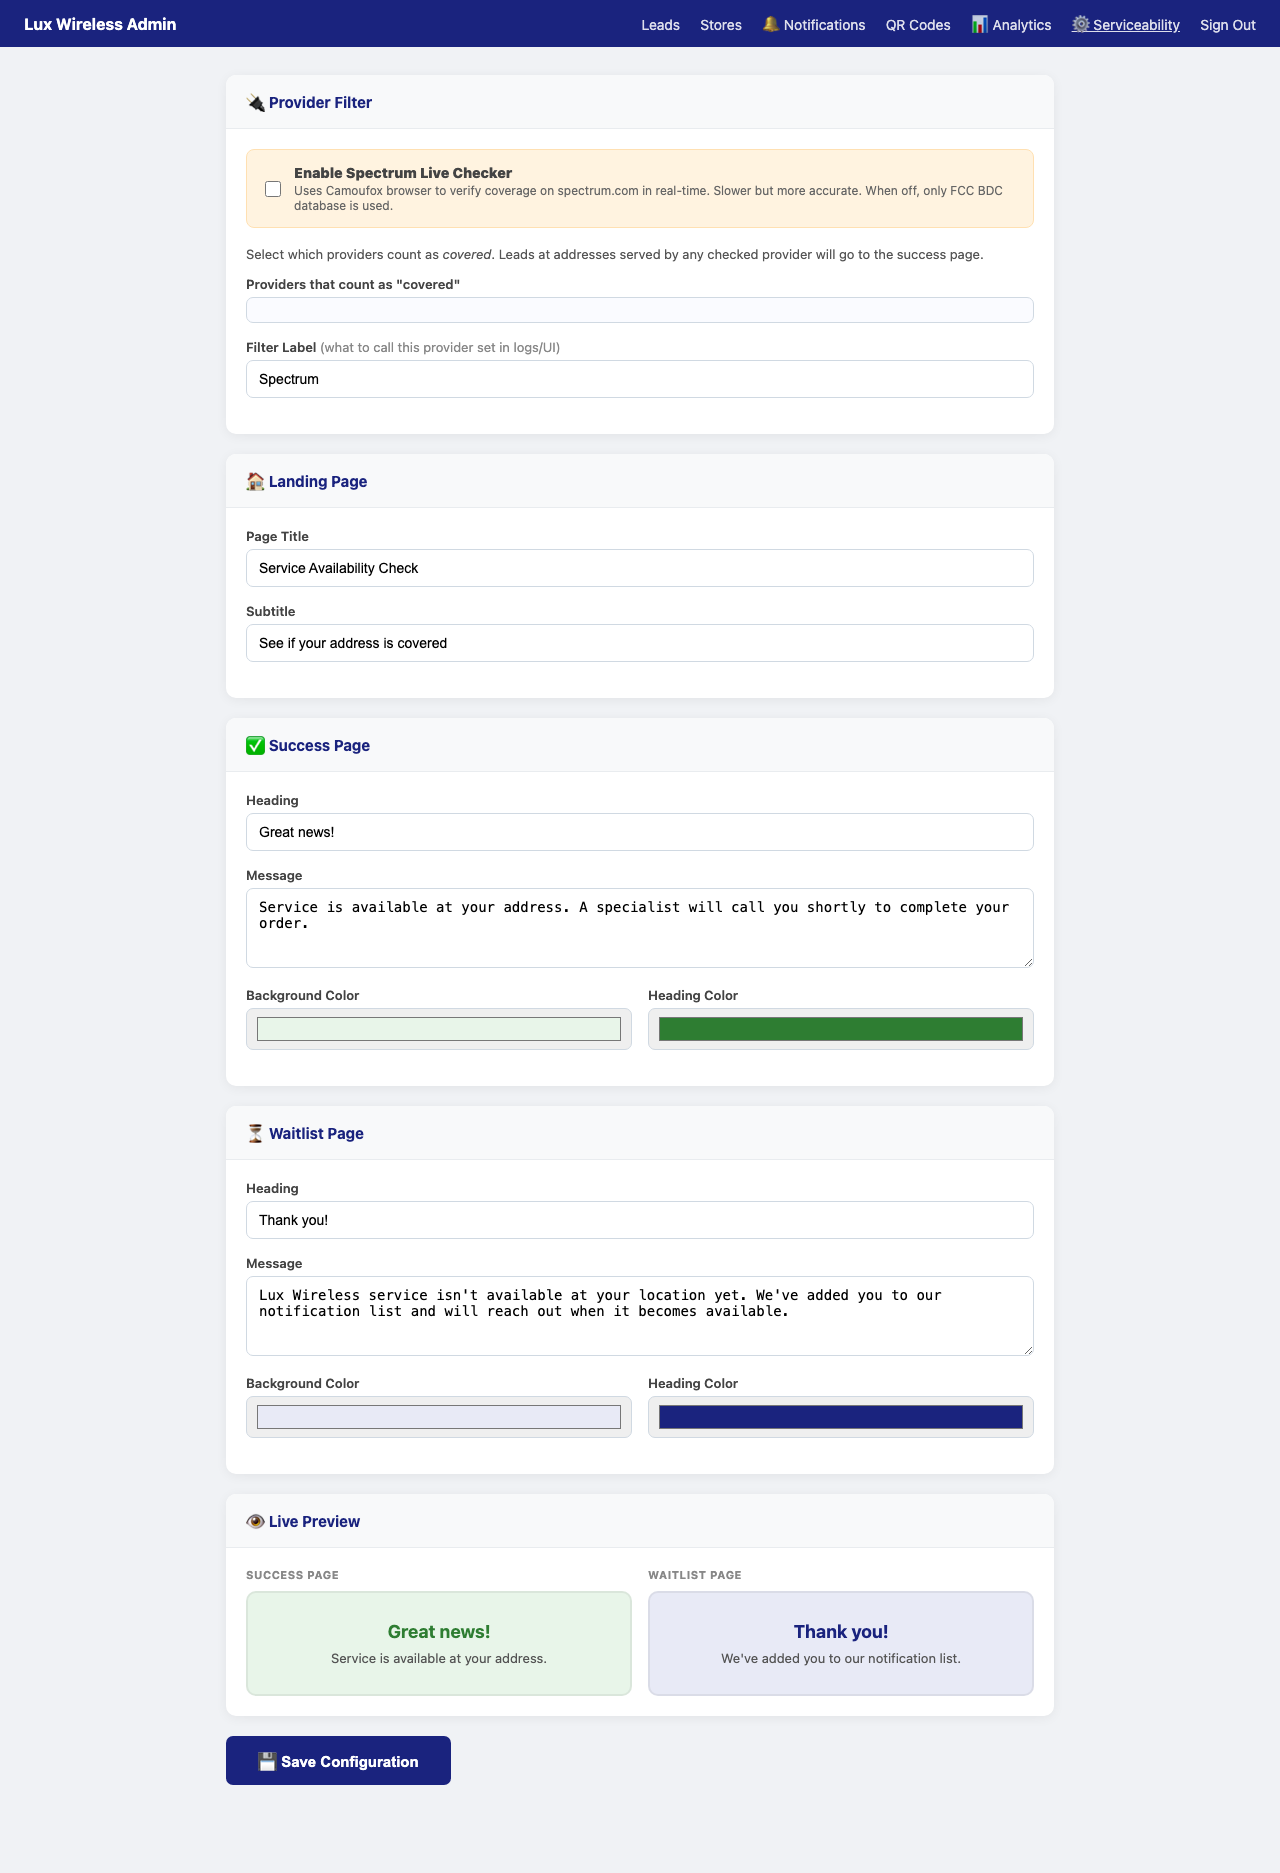
Settings available here include: - Spectrum API endpoint and request parameters - Request timeout values - FCC API fallback behavior (enable/disable, data source preferences) - Coverage determination rules (what constitutes a “covered” address)
⚠️ Caution: Changes to serviceability configuration affect every coverage check. Test changes carefully and consult your technical lead before modifying API settings in production.
7. Lead Lifecycle
7.1 How a Lead Enters the System
A lead is created when a customer submits the coverage check form at
https://luxwireless.com/check. The submission
(POST /submit) captures:
- First name, last name
- Phone number
- Full address (street, city, state, zip)
Before saving, the system runs a real-time coverage check (see Section 7.2). The result — covered or not covered — is stored with the lead along with a timestamp, the originating store (from QR token or rep location), and the rep (if a rep is checked in at a location).
7.2 Coverage Check Flow
When a lead is submitted, the system performs a two-step coverage check:
Step 1 — Spectrum API Check - The system uses
Camoufox (a browser automation tool) to query Spectrum’s coverage API
with the customer’s address - If Spectrum returns a definitive coverage
result, it is stored as spectrum_code on the lead - Result:
covered or not covered
Step 2 — FCC API Fallback - If the Spectrum check is
inconclusive or fails, the system queries the FCC’s broadband data API -
FCC data identifies available providers, technologies (fiber, cable,
DSL), and advertised speeds at that location - This data is stored in
the lookup_cache table and displayed on the Lead Detail
Page
The combined result of both checks is cached and displayed on the Lead Detail Page as the full serviceability profile for that address.
7.3 Lead Status Workflow
Every lead moves through a defined status lifecycle:
[New] → [In Progress] → [Sold]
↘ [Customer Declined]| Status | Who Sets It | When |
|---|---|---|
| New | System (automatic) | When the lead is first submitted |
| In Progress | Sales Rep | When the rep makes first contact or begins working the lead |
| Sold | Sales Rep | When the customer signs up for service |
| Customer Declined | Sales Rep | When the customer declines or is unresponsive |
There is no automatic status progression — reps must manually update each lead as the sales process advances.
7.4 Notifications Flow
When a new lead is created:
- The system evaluates each user’s notification preferences
- For users who have New Lead Alerts enabled, the
system checks:
- Is this user’s Covered Only filter satisfied? (Is the lead covered, or is the filter off?)
- Is this lead from one of the user’s assigned stores / own leads?
- Are quiet hours currently active for this user?
- If all conditions pass, notifications are dispatched via the user’s enabled channels (email, SMS, ntfy)
- An entry is added to the user’s Alert Feed regardless of external notification channel
8. QR Code System
8.1 How QR Codes Work
Each QR code contains a unique URL:
https://luxwireless.com/qr/<token>
When a customer scans the code: 1. Their browser opens the QR URL 2.
The system reads the token, looks up the associated store, and saves the
store ID in the browser session 3. The customer is redirected to the
coverage check form at /check 4. When they submit the form,
the lead is automatically attributed to the QR code’s store 5. The QR
code’s scan count increments by one
8.2 Creating QR Codes
As an admin: See Section 6.4 — QR Code Management
As a store user: See Section 5.3 — QR Code Management
Every QR code gets: - A unique token (randomly generated, unchangeable) - A human-readable label (you set this — e.g., “Entrance Sign Q1 2026”) - A scan count that starts at 0 and increments with each scan - An active/inactive toggle
8.3 Scanning Flow
Customer scanning a display QR code: 1. Customer
scans the QR code at a store or event 2. Browser opens
https://luxwireless.com/qr/<token> 3. System sets
store attribution in session 4. Customer is redirected to the check form
5. Customer fills out form and submits 6. Lead is created with correct
store attribution
Rep scanning a QR code (check-in): 1. Rep scans the
store QR code on their phone (URL:
/rep/sales/qr/<token>) 2. System recognizes the rep’s
logged-in session 3. Rep’s current location is set to the scanned store
4. Rep is redirected to their Sales Dashboard with location
confirmed
8.4 Store Attribution
Every lead has one store attribution, set by whichever of these methods fires first:
- QR scan (customer) — Customer scanned a store’s QR code before submitting
- Rep location — A logged-in rep has their location set to a store
- No attribution — Lead was submitted without a QR token and no rep location is set
Store attribution determines: - Which store’s dashboard the lead appears on - Which store users and managers see it - Which notifications fire (per store-specific notification settings)
9. Notification System
9.1 Notification Channels
The LMS supports three external notification channels, plus an in-app alert feed:
| Channel | How It Works | Best For |
|---|---|---|
| Sends a notification email to the user’s address | All users, reliable delivery | |
| SMS | Sends a text via email-to-SMS gateway (carrier email bridge) | Quick glance, no app required |
| ntfy | Push notifications via the ntfy protocol | Mobile and browser push, real-time |
| Alert Feed | In-app notification list at /rep/alerts |
Always on, no config needed |
All four can be active simultaneously for any user.
9.2 Configuration
Admins configure notifications for all users at
/rep/admin/notifications.
Each user’s settings are independent. A user can have email enabled but SMS disabled, or SMS and ntfy but not email.
SMS setup: Enter the user’s mobile phone number and
select their carrier. The system uses the carrier’s email-to-SMS gateway
(e.g., number@txt.att.net) to send SMS messages without a
dedicated SMS service.
ntfy setup: Each user gets an assigned ntfy topic.
They subscribe to that topic in the ntfy app or browser extension to
receive push notifications. The topic URL is available at
/rep/api/notification-config.
9.3 Alert Feed
The in-app Alert Feed is always available at /rep/alerts
and does not require any external service.
Every new lead generates an alert for eligible users regardless of external channel settings. The alert feed is the fallback that ensures nothing gets missed.
Features: - Chronological list of new lead alerts - Each alert links directly to the lead detail page - Unread count badge on the navigation bell icon - Mark individual or all alerts as read
9.4 Browser Notifications via ntfy
ntfy is an open-source push notification service. To receive browser or mobile notifications:
- Ask your administrator for your ntfy topic URL (or find it at
/rep/api/notification-config) - Mobile: Download the ntfy app (iOS or Android) and subscribe to your topic URL
- Browser: Visit your ntfy topic URL in a browser and click the Subscribe button to enable browser push notifications
When a new qualifying lead arrives, you’ll receive an instant push notification on all subscribed devices.
9.5 Quiet Hours
Quiet hours let you suppress notifications during specific time windows — typically overnight or during off-hours.
To set quiet hours: 1. Admin navigates to
/rep/admin/notifications 2. Select the user 3. Enable
Quiet Hours and set the start and end times 4. Save
During quiet hours, external notifications (email, SMS, ntfy) are not sent. Alerts still accumulate in the in-app feed and are waiting when quiet hours end.
9.6 Testing Notifications
Admins can send test notifications to verify that channels are configured correctly.
Test SMS: 1. Go to
/rep/admin/notifications 2. Select a user with SMS enabled
3. Click Send Test SMS (submits to
/rep/admin/notifications/test-sms) 4. A test message should
arrive at the user’s phone within a few seconds
Test ntfy: 1. Go to
/rep/admin/notifications 2. Select a user with ntfy enabled
3. Click Send Test Notification (submits to
/rep/admin/notifications/test-ntfy) 4. A test push
notification should arrive on the user’s subscribed devices
If test notifications fail, verify: - SMS: Phone number format and carrier selection are correct - ntfy: The user has subscribed to the correct topic in the ntfy app/browser
10. Reports & Analytics
10.1 Analytics Dashboard Charts
The Analytics Dashboard at /admin/analytics provides
five built-in visualizations updated with live data.
Leads by Day (30-Day Trend) A line chart plotting daily lead volume for the past 30 days. Use this to: - Spot trends (growing, shrinking, flat) - Identify days of the week with consistent high or low volume - Correlate lead spikes with marketing campaigns or events
Leads by Store A bar chart ranking stores by total lead count. Use this to: - Identify your highest-performing locations - Spot stores that may need more traffic (more/better-placed QR codes)
Leads by Rep A bar chart ranking reps by total lead count. Use this for: - Performance reviews - Identifying reps who may need coaching - Recognizing top performers
Coverage Rate A donut chart showing the ratio of covered vs. uncovered leads. Use this to: - Assess whether you’re targeting the right service areas - Identify if a large portion of leads are outside Spectrum’s footprint
Top Zip Codes A table of zip codes ranked by lead count. Use this to: - Identify the most active neighborhoods - Focus marketing and QR placement where demand is highest - Spot geographic expansion opportunities
10.2 BI Report Builder
The BI Report Builder at /reports/ gives admins a
flexible tool for creating custom data reports beyond the built-in
analytics charts.
10.3 Report Templates
Navigate to /reports/templates to see pre-built report
templates. Templates are the fastest way to create a new report — they
come pre-configured with useful filters and columns.
To create a report from a template: 1. Click a template name on the Templates page 2. The template opens in the report builder, pre-configured 3. Adjust any filters or settings as needed 4. Click Save to add it to your report list 5. Click Run to execute it immediately
10.4 Running Reports
To run a saved report: 1. Navigate to
/reports/ 2. Click the report name 3. On the report page
(/reports/<id>), click Execute
(submits to /reports/<id>/execute) 4. Results appear
on the page — rows of data matching the report’s filters and columns
Execution history: - After each run, an entry is
added to the report’s execution log - Navigate to
/reports/logs to see all past runs across all reports: who
ran it, when, and what results it returned
10.5 Exporting Reports
Every report can be exported in two formats:
CSV Export: 1. On the report page, click
Export CSV
(/reports/<id>/export/csv) 2. A .csv
file downloads — open in Excel, Google Sheets, or any spreadsheet
app
PDF Export: 1. On the report page, click
Export PDF
(/reports/<id>/export/pdf) 2. A formatted PDF report
downloads — suitable for printing or sharing with stakeholders
10.6 Favorites and Sharing
Favorites: - On any report, click the star
icon to toggle it as a favorite (submits to
/reports/<id>/favorite) - Favorited reports appear at
the top of your report list for quick access - Favorites are per-user —
your favorites don’t affect other users’ lists
Sharing: - Reports can be shared with other users
(the system includes a report_shares table) - Sharing
functionality allows collaborating on reports without each user having
to recreate them
Appendix A — Troubleshooting
Login Issues
“Invalid username or password” - Double-check that
you’re using the correct login portal. Store users must use
/store/login; reps and admins must use
/rep/login. - Passwords are case-sensitive. Make sure Caps
Lock is off. - Contact your administrator to reset your password.
“Account is inactive” - Your account has been deactivated. Contact your administrator.
Coverage Check Not Working
Address returns an error - The address may not be
formatted correctly. Use the full street address with zip code. - The
Spectrum API may be temporarily unavailable. Wait a few minutes and try
again. - Check the Telemetry dashboard
(/rep/admin/telemetry) for API error rates.
Coverage result seems wrong - The Spectrum API result is cached after the first lookup. Results reflect Spectrum’s coverage data at the time of the check. - Check the FCC data section on the Lead Detail Page for a second opinion. - Contact Spectrum directly if you believe a coverage result is inaccurate.
Notifications Not Arriving
SMS not arriving - Verify the phone number and carrier are correct in notification settings. - Ask your administrator to send a test SMS. - Some carriers may delay or block email-to-SMS messages. Try a different carrier gateway if possible.
ntfy notifications not arriving - Confirm you’ve subscribed to the correct topic in the ntfy app. - Check that the ntfy app has notification permissions on your device. - Ask your administrator to send a test ntfy notification.
Email not arriving - Check your spam/junk folder. - Verify your email address is correct in your rep profile.
QR Code Not Working
QR scan takes customer to wrong store - QR codes are tied to specific stores. Verify you’re using the QR code for the correct store. - If a QR code was accidentally created for the wrong store, create a new one for the correct store and retire the old one.
QR scan count not incrementing - Each completed scan (where the customer’s browser successfully loaded the QR redirect URL) increments the count. Partial scans (user scanned but browser didn’t load) may not count.
Appendix B — Glossary
| Term | Definition |
|---|---|
| Lead | A potential customer who submitted the coverage check form |
| Covered | The customer’s address is within Spectrum’s service area |
| Uncovered / Not Covered | The customer’s address is outside Spectrum’s service area |
| Status | The current stage of a lead in the sales process: New, In Progress, Sold, or Customer Declined |
| Reference Number | The Spectrum account or confirmation number assigned when a customer signs up |
| Store Attribution | Which store “owns” a lead — set by QR scan or rep check-in |
| QR Token | The unique identifier encoded in a store’s QR code URL |
| Scan Count | How many times a QR code has been scanned |
| ntfy | An open-source push notification protocol used for mobile and browser alerts |
| Quiet Hours | A time window during which external notifications are suppressed |
| Impersonation | An admin feature to view the system as a specific rep or store user |
| Rep | A sales representative, store manager, or admin user (non-store account) |
| Store User | A store-level login account (distinct from rep accounts) |
| Spectrum Code | The coverage result code returned by Spectrum’s API for a given address |
| FCC API | The Federal Communications Commission’s broadband data API, used as a coverage fallback |
| Camoufox | The browser automation tool used to query Spectrum’s coverage API |
| CSV | Comma-Separated Values — a spreadsheet-compatible file format used for data exports |
Appendix C — Contact & Support
System URL: https://luxwireless.com
For account issues (password resets, new accounts, deactivations): Contact your system administrator.
Current administrators: - Tom (Admin) - Lee Scarbrough (Admin)
For technical issues (system errors, data problems, API failures): Contact your administrator, who can review the Telemetry dashboard and system logs.
For billing or Spectrum-specific questions: Contact Spectrum directly. The LMS is a lead management tool — it does not handle Spectrum billing or account management.
Lux Wireless LMS — User Guide v1.0
This guide reflects the current system configuration: 4
representatives, 2 stores, Hetzner-hosted at 5.161.249.196.